screens photography
Screens of different kinds have provided the stimulus for a number of filmmakers and photographers. Screens can protect, obscure, reflect or partially reveal. examples can be seen in the sculputers of Christo and jeanne-claude. Hiroshi sugomoto's long exposure recordings of cinema screens and Douglas cordons video installations. consider relevant work by others and respond in your own way.
Hiroshi sugomoto
Hiroshi Sugomoto is a Japanese screen photographer. He specialises in taking photographs of cinema screens. As unusual as this sounds, this works very well for this photographer. This is because of the black and white effect he puts on everyone of his photographs. This makes his photographs have a much more gloomy and creepy vibe which is his trademark atmosphere that he always aims to portray. His photographs very rarely have any other people or living creatures in it which defiantly gives the photograph a very aerie and almost abandoned atmosphere. I personally think that Sugomoto's work is very intriguing and very clever. He is easily one of the most interesting photographers and possibly, from looking at his photographs alone, my favourite photographer that I have ever researched since I started the course.


christo and Jeanne-Claude


Christo and Jeanne Claude were a married couple who created environmental works of art. Christo and Jeanne-Claude were born on the same day, June 13, 1935. They used screens in many of their sculptures to capture images of their environmental creations
my previous work
Screens photography will allow me to explore many different types of photographs and expand my knowledge on photography as a whole. Screen photography can include many different aspects of using photography such as projections, green screens and much more. I will be using the promethium smart board that the school provides for the 6th form students. I will be taking photographs of different models from my photography class. I will be taking headshot of my classmates with many different projections on their face from the promethium board.
I have took similar images to this in the past for different pieces of coursework as seen below.
I have took similar images to this in the past for different pieces of coursework as seen below.


These are some of the photographs I have took in the past. With these photographs I took them on the spot yet with this topic I will plan my projection photographs in advance before I take them. I will sort out who will be modelling for me in advance before the day that the pictures will be taken and I will also pick a projection that will be on the face of the model in advance.
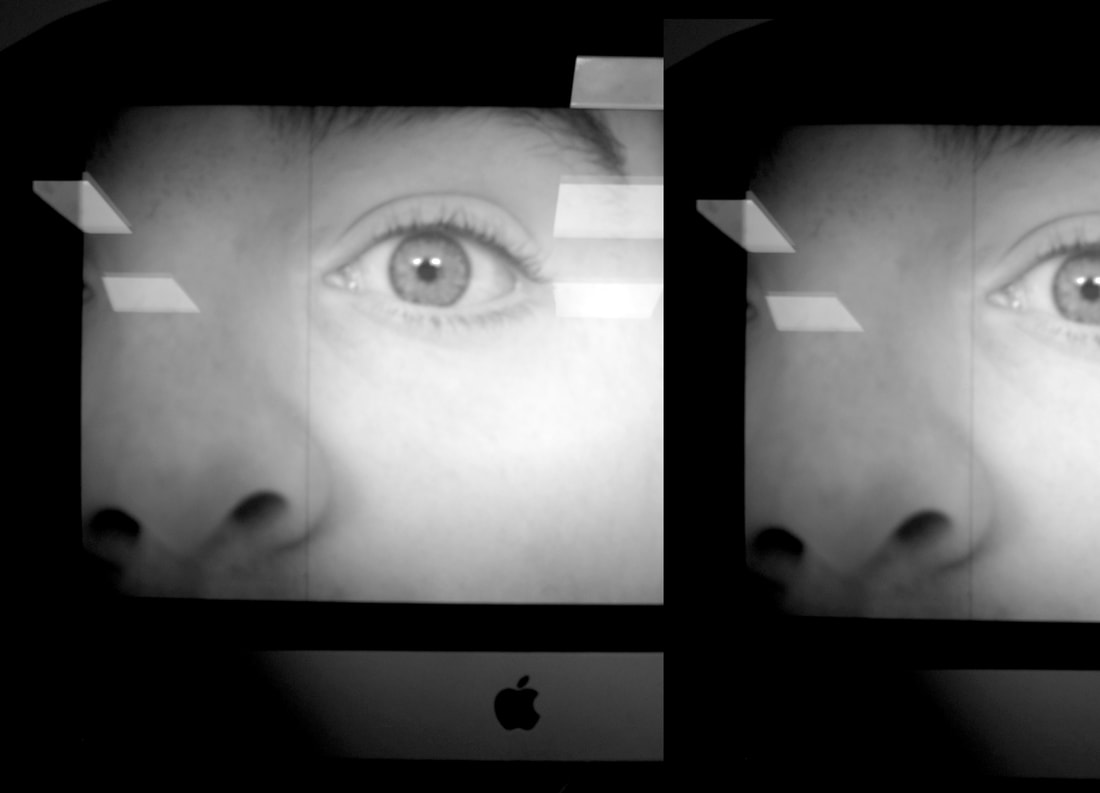
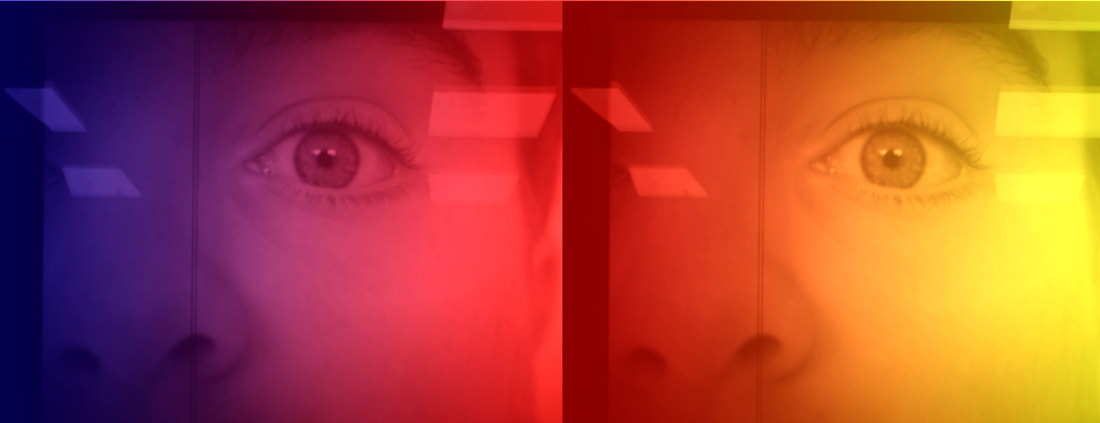
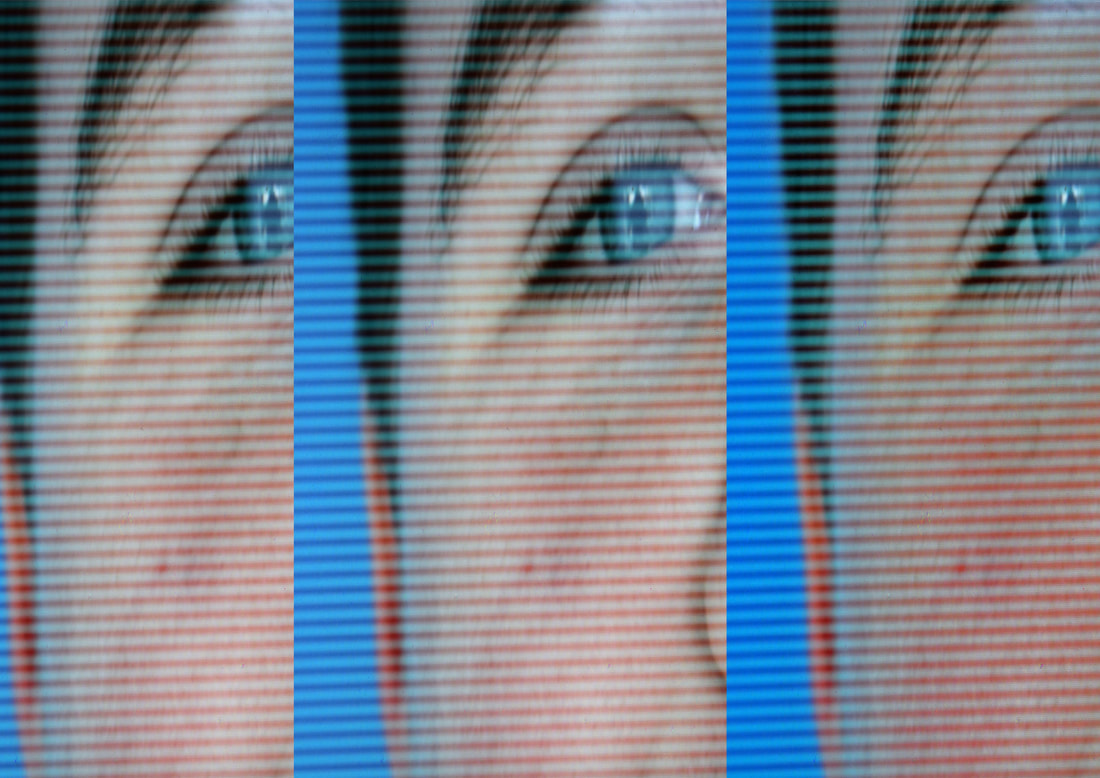
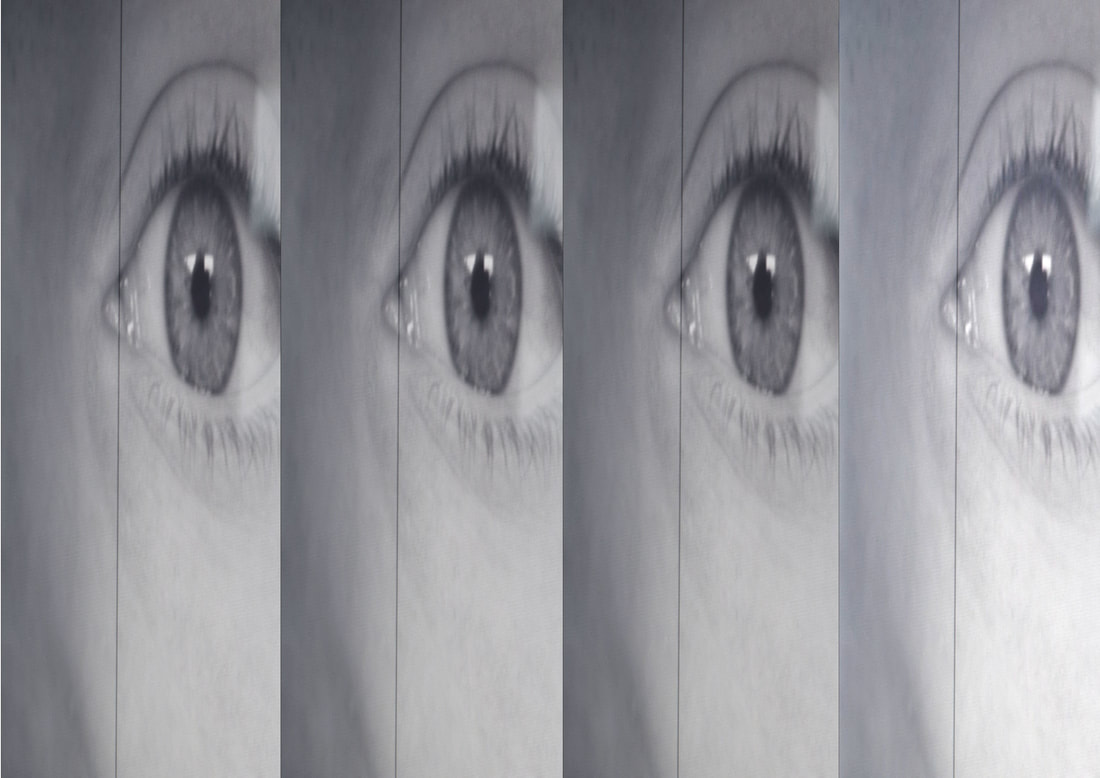
The television screen effect.
Television is a huge part of our cultural lifestyle. I have presented my images using a monitor to recreate a low tech tv screen effect. The theme plays upon how TV can be very intrusive into peoples private lives. There is almost a CCTV appearance to this work. This draws upon the subject of privacy and the use of screens. We live in a time when we are monitored more than ever before.


Black and white work
The black and white effect is very simple yet effective. It is one of the easiest effects to use from the whole of photoshop yet it has one of the biggest effects out of any of the photoshop features. This can potentially give a seemingly normal and harmless unedited photograph a completely different


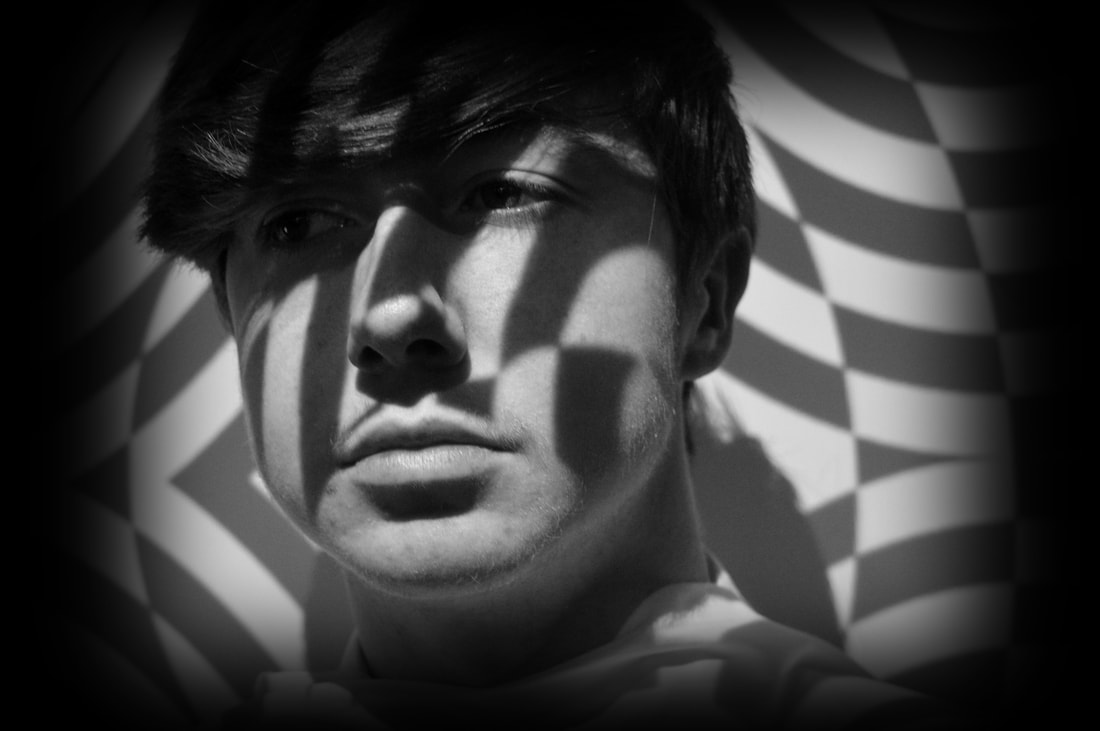
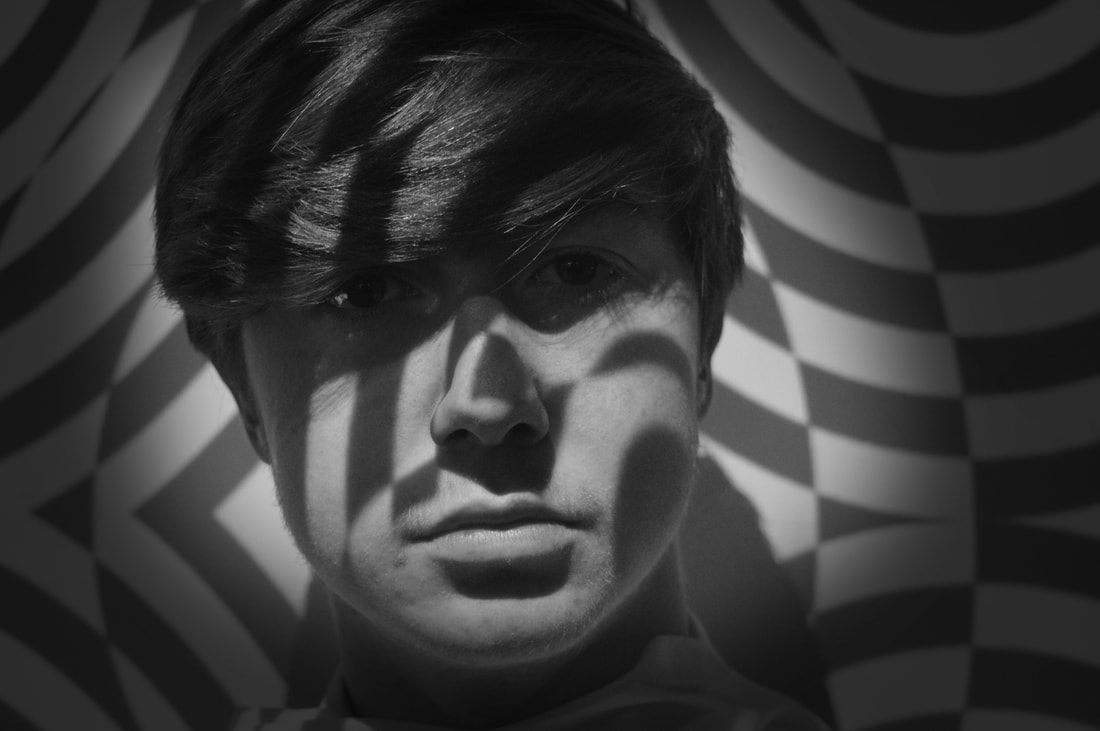
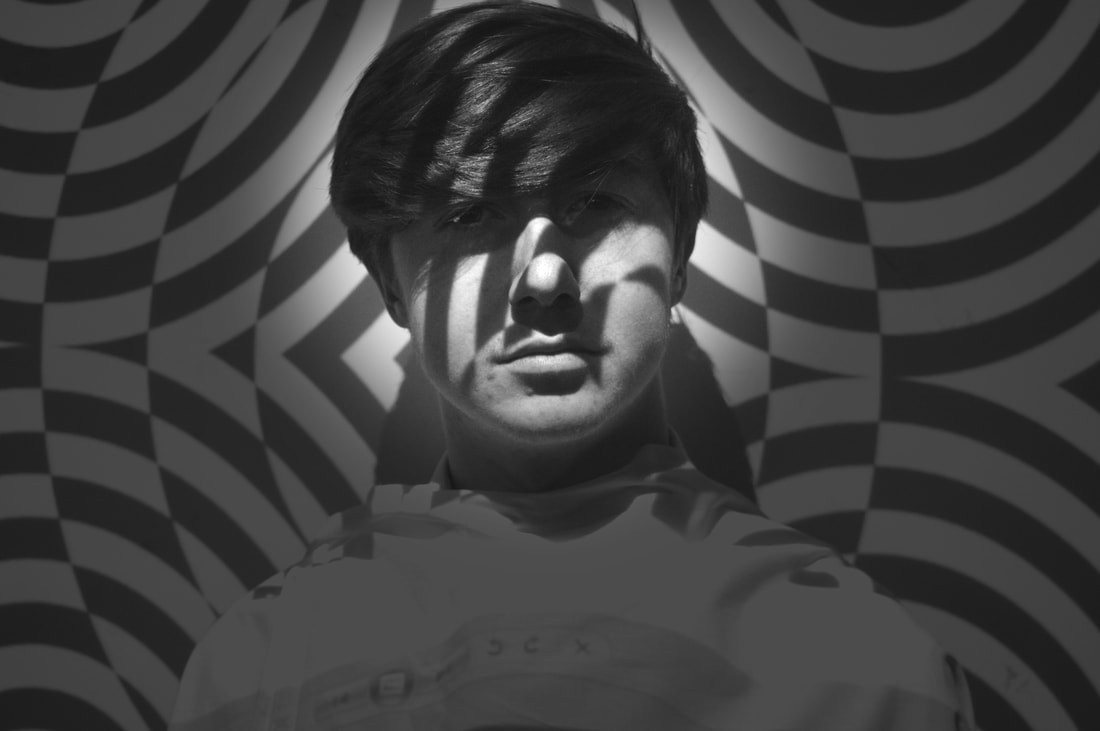
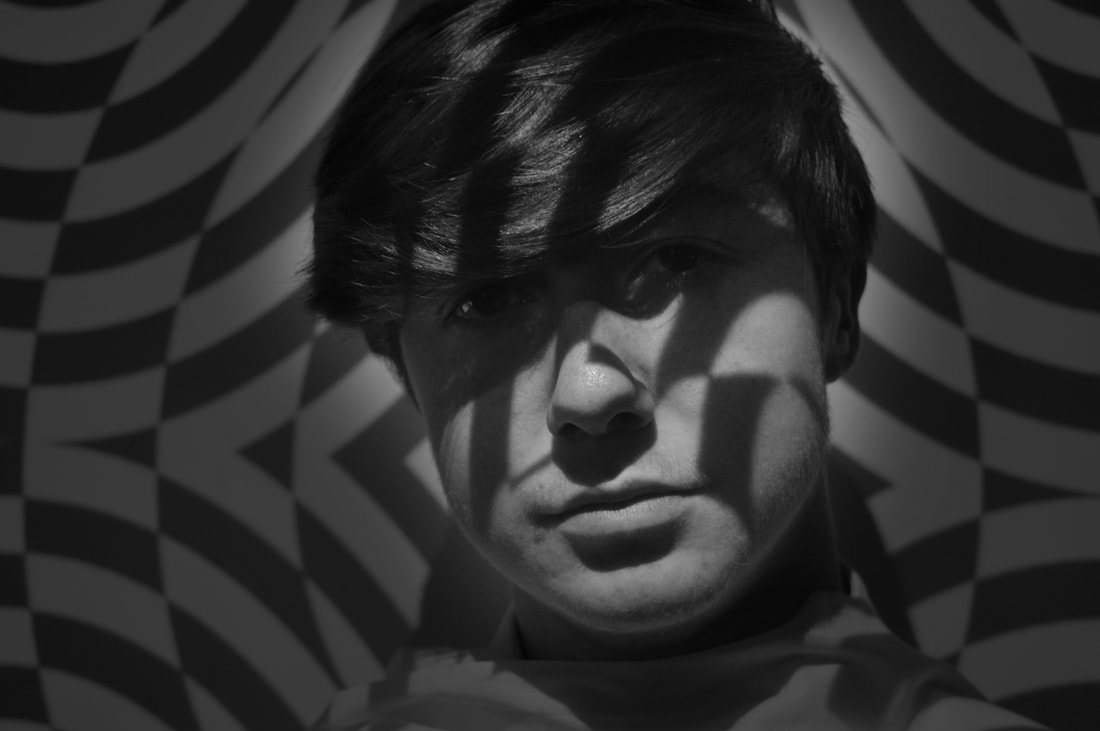
Vignettes
As you can see below, I have created vignette images. A vignette is an image that has the shadow around the edges of the photograph in a circular motion. This makes the centre of the image the brightest section of the photograph and gives something for the audience to focus on. For example, in the photographs below, I have purposley
|
|
|
|
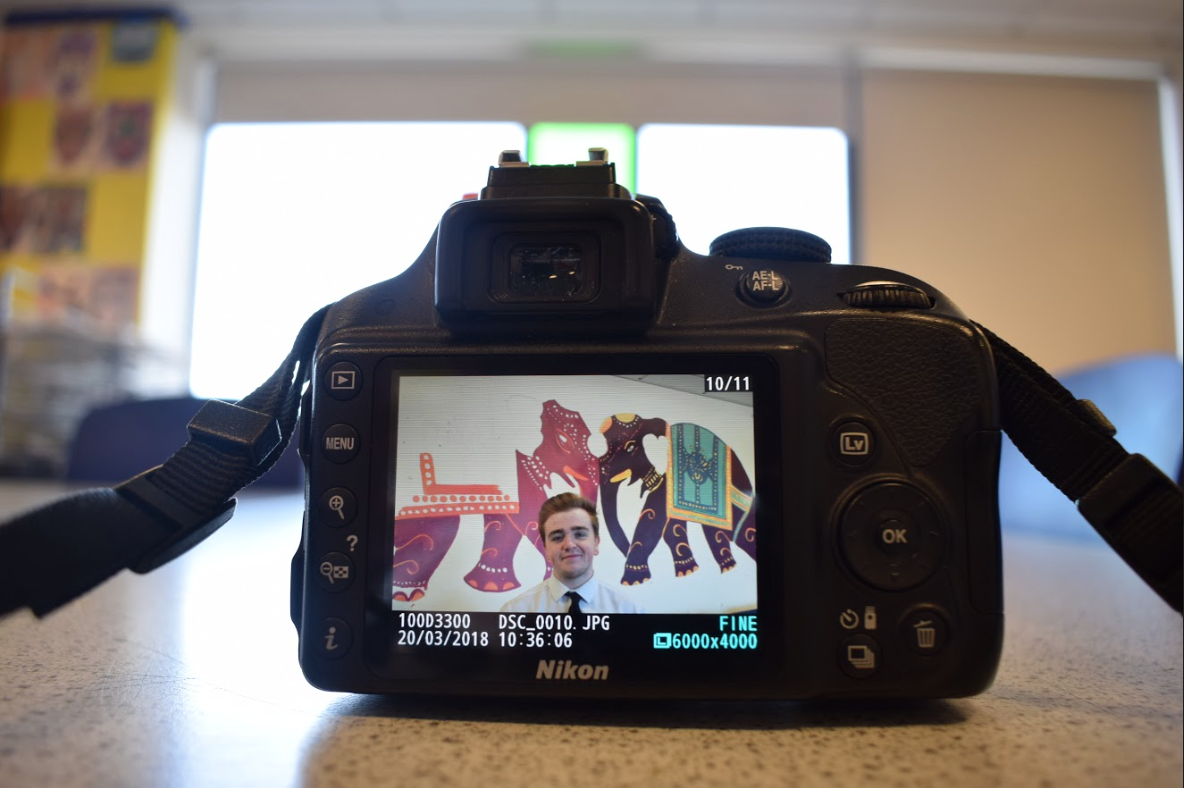
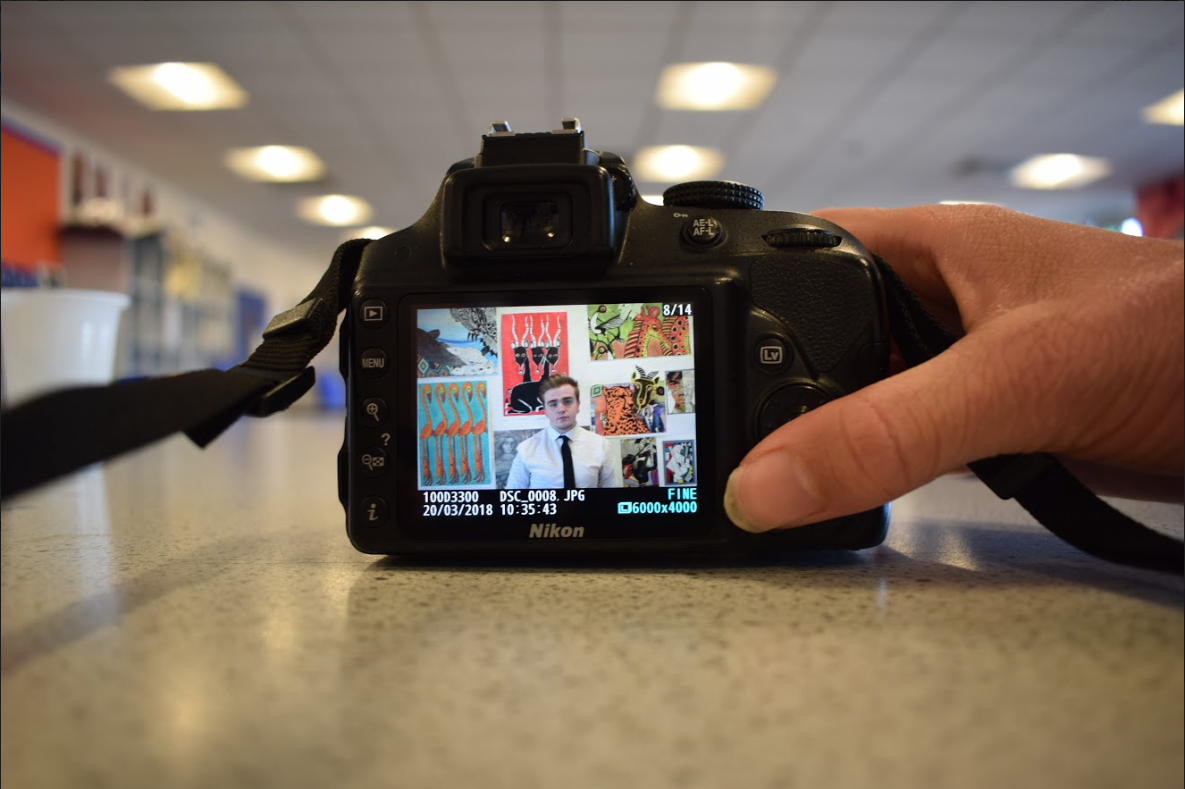
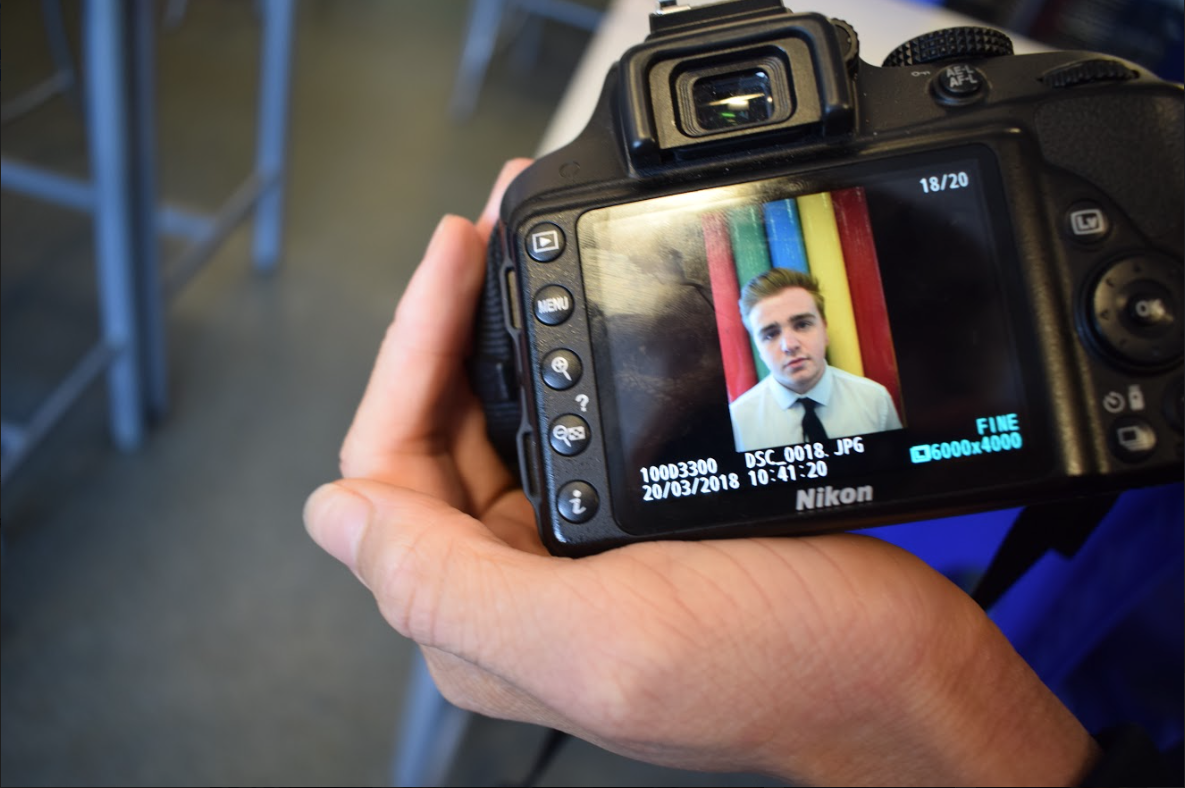
camera on camera
The Camera on camera work is very creative and has worked very successfully. We took photos of each other and then took photographs of the first photograph we had taken which we had showing on the first camera. This adds a whole new dimension to this part of photography and is clearly very helpful and useful. There is many different ideas that you can use in this field.


|
|
News Reports


My favourite camera on camera shot
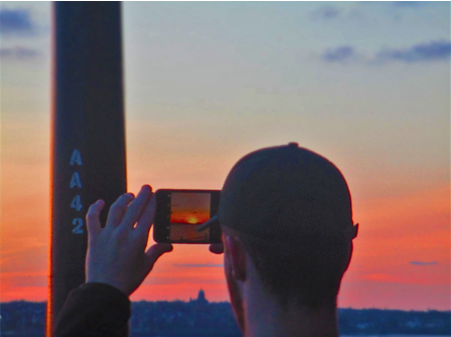
This photograph is one of my favourite that I have took on this particular screen topic or maybe even since I’ve been doing this photography course. This is of course because of the beautiful sunset that I captured with my camera and also, I captured the sun in all its glory in the camera that my friend is using. This is a fantastic technique and It is a shame that I do not have more photographs similar to this one that I can edit.
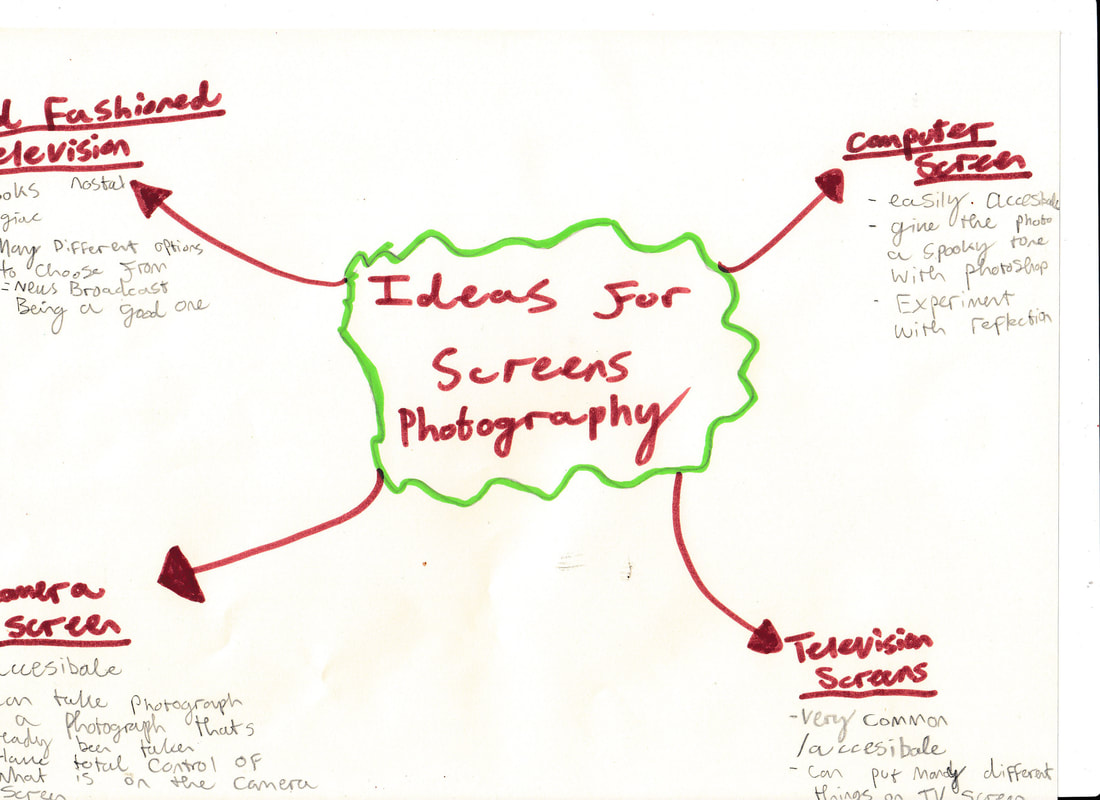
mindmap
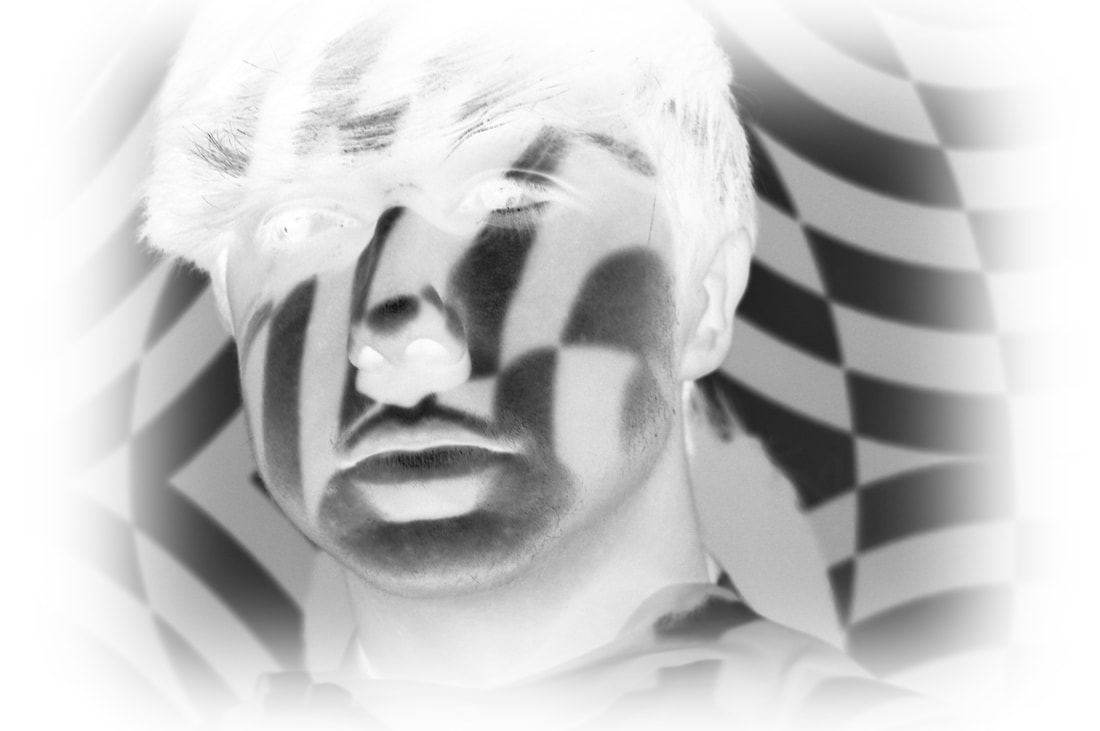
Invert images


The photographs above are a very different and I’d like to say unique style from what I usually try and create. Obviously, these pictures have also been heavily photoshopped using a few different effects on off on the Photoshop software. Yet these photographs were taken in my bedroom at night. I closed the curtains and turned the lights off so the room was pitch black and the only thing generating any light was my television. I took a few pictures but, in all honesty, they didn’t come out as I hoped, yet I have managed to salvage some interesting images out of them as you can see above. Firstly, on every one of these images I used the brightness tool to make the picture as bright as possible due to the original image being very dark and barely visible. Once the image is as bright as possible, I chose the ‘Invert’ option after clicking image on the top scroll bar, then clicking adjustments, then near the bottom is the invert option. This inverts the colours on the screen to a bright opposite colour, as you can see above. I am very happy that I discovered this invert feature as I think it has worked wonders for my photographs which I nearly write off myself. I was going for a daunting, spooky, mysterious atmosphere as I took the photographs and I feel like this invert effect greatly helped me catch exactly that.
Altering the colour balance


Colour balance is one of Photoshop’s most overlooked tools and one that is not used as much as other tools such as Black and White or Hue/Saturation for example. Yet from experimenting with this tool, it is clear that this tool can greatly increase the quality of the photograph you’re editing.
I was trying to look for a way to edit this photograph. I wanted it too stand out more for looking old-fashioned and I wanted to try and make this old-fashioned aspect of the photograph the main feature of the photograph. It took me a while to figure out but colour balance tool was my best bet for this. This is due to it letting me adjust the colour of the photograph which in my opinion really effected its style.
The image On The Right is the Photoshopped version of the original image. As you can see, I have used the colour balance tool to make the image look more old-fashioned and I think that I have succeeded in this. Using the Colour balance mechanism, I added a Cyan tilt to the original image. I believe this makes my image look a lot older fashioned and adds a certain ‘quirky’ aspect to it that it was previously lacking.
Overall, I am very happy with how the image turned out. Using this tool, I captured the nostalgia of the image perfectly. Yet if I was to do this again I would take more images that include text. This is due to the text looking better after it has been photoshopped and being easier to work with in the final production.
Gaussian blur
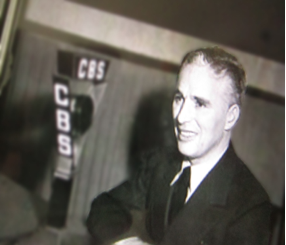
Gaussian Blur is one of my personal favourite techniques to use on Photoshop. This is due to its ease and simplicity to use yet it has an extreme effect to the photograph you are editing. I have used the Gaussian Blur tool on my ‘News reporter’ photographs. This photograph was taken by my camera yet I took them of my phone screen. This is because is searched for old looking news broadcasts to take pictures of. I was recommended to do this by my photography teacher and I am happy with how the image turned out. I would of liked to get even more of these type of images than I already have but unfortunately I was pushed for time and many of these images where hard to find on the internet.
On the image you see above I have used Gaussian Blur. I have drawn around the subject of the image using the lasso tool and then selected the ‘inverse’ option from the ‘select’ option on the toolbar at the top of the screen. Next, I selected the Gaussian Blur tool. This made everything apart from the topic that I have drew around a blur. I think this has a very good and interesting effect as it makes the audience focus on the person of the photograph, giving it a whole new perspective.
On the image you see above I have used Gaussian Blur. I have drawn around the subject of the image using the lasso tool and then selected the ‘inverse’ option from the ‘select’ option on the toolbar at the top of the screen. Next, I selected the Gaussian Blur tool. This made everything apart from the topic that I have drew around a blur. I think this has a very good and interesting effect as it makes the audience focus on the person of the photograph, giving it a whole new perspective.
photoshopped reflections


For this exam, I took many different types of photographs. Some of my favourite photographs that I took were the ones that included reflection. I captured reflection in many ways such as in windows and different screens but I mostly captured the reflections in water. Although I think that the raw images I captured looked very good and professional, I decided to use the Photoshop software on them to try and improve their quality and I think this was very successful. I decided that with these photographs in particular, I wanted to make the reflection part of the photograph stand out more. To do this, I used the Lasso tool to carefully draw around the reflection, I then clicked the ‘select’ option at the top of the page, then I chose the ‘’Inverse button, before finally selecting ‘Black and White’. This sequence of Photoshop techniques caused everything in the image to turn Black and White, Except for the part of the image that I drew around using the lasso tool. Examples of these images are above.
I am very pleased with how the images above turned out and I am happy with how the reflection looks. I think increasing the vibrancy and the saturation really helped he image as it made the reflected part of the image stand out even more and created a greater contrast between the black and white section of the image and the coloured section of the image.
I am very pleased with how the images above turned out and I am happy with how the reflection looks. I think increasing the vibrancy and the saturation really helped he image as it made the reflected part of the image stand out even more and created a greater contrast between the black and white section of the image and the coloured section of the image.
Eye images


These images are some of my favourite that I have created so far. This is due to the contrast from the colour in the eye to the black and white in the rest of the image. I am also very happy with how you can see a very vein yet easily visible reflection of the photographer when you look into the pupil of the eye.
I created this image by again, circling the eye using the lasso tool. I then clicked ‘select’ then ‘inverse” This makes everything around the lasso tool turn to black and white. I then selected the eye that I circled and increased the vibrancy and colour balance so the colour of the eye is the only thing with colour in the image naturally meaning that the colour of the eye stands out a lot more.
merging images
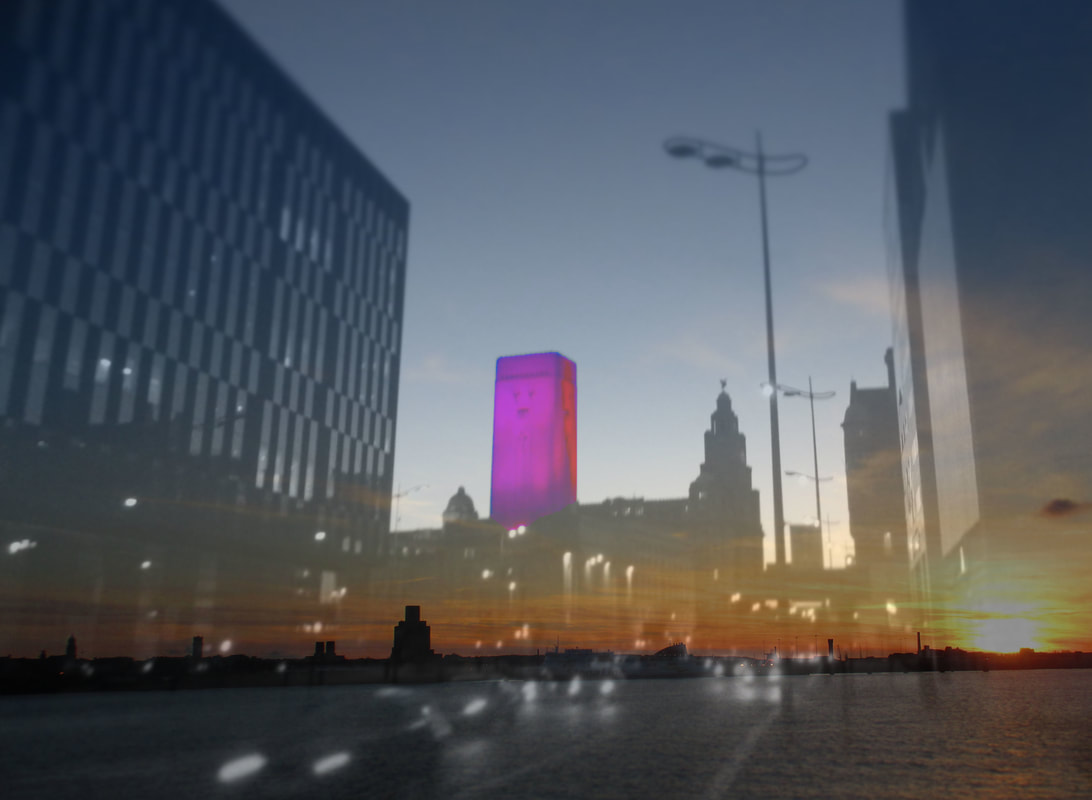
Merging two images together is one of my favourite Photoshop techniques. This is because there is an endless amount of potentially new and creative pictures to work with on Photoshop. The image below is two of my images I have took merged together. The pink tower is what makes this photograph relevant to my topic of screens as the colour is being projected onto the tower using some sort of screen. I turned this image Black and White but using the lasso tool I left the tower Pink as it is the main focus of the image. I also increased the colour balance to a stronger Magenta colour to make the tower a more vibrant colour. The other image I used was taken from the albert dock and is, in my opinion, a very good quality picture of the sun setting over Birkenhead. One of the reasons I am a fan of this image is the placement of the sun and the cars. The cars look like they are travelling away from the sun which is something that could make the audience think that this photograph has a deeper meaning.
Overall I am pleased with how this image has turned out and think it is one of the better merging images that I have ever created.
Overall I am pleased with how this image has turned out and think it is one of the better merging images that I have ever created.
experimental


My final peice


The photographs above have been heavily edited on Photoshop. I have used the lasso tool to outline the camera screen with the model on. I have then clicked the inverse option if I wanted the black and white effect to be inside the camera screen. I would then click the ‘image’ bar at the top of the page, then click the ‘adjustments’ option from the scroll bar then choose ‘Black and white’ option. Presuming no errors was made this would make either the screen of the camera or everything but the screen of the camera black and white, depending on weather you ‘inversed’ the image after using the ‘Lasso tool’.
Although I was happy with the original photographs I had taken, I think this method is very simple yet useful and I am very happy with how my photoshopped photographs came out once I had edited them. Other features of the Photoshop software such as the brightness and contrast can also be changed to give the image a different edge and make certain aspects of the image stand out more. Overall, I am very happy with the photographs above and what they look like now they have been edited.
Although I was happy with the original photographs I had taken, I think this method is very simple yet useful and I am very happy with how my photoshopped photographs came out once I had edited them. Other features of the Photoshop software such as the brightness and contrast can also be changed to give the image a different edge and make certain aspects of the image stand out more. Overall, I am very happy with the photographs above and what they look like now they have been edited.
